# Setting Up Billing
There are three steps to set up billing information.
- Add or edit your company billing information.
- Add billing contacts.
- Add a form of payment.
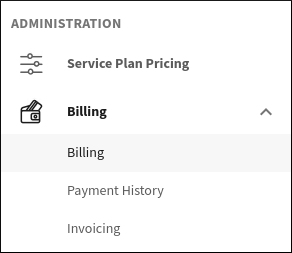
# Access the Billing Settings
To begin selling QuickCover® plans, you will need to configure billing.
To access the billing configuration:
- Expand Administration > Billing in the left-side navigation menu.
- Click Billing.
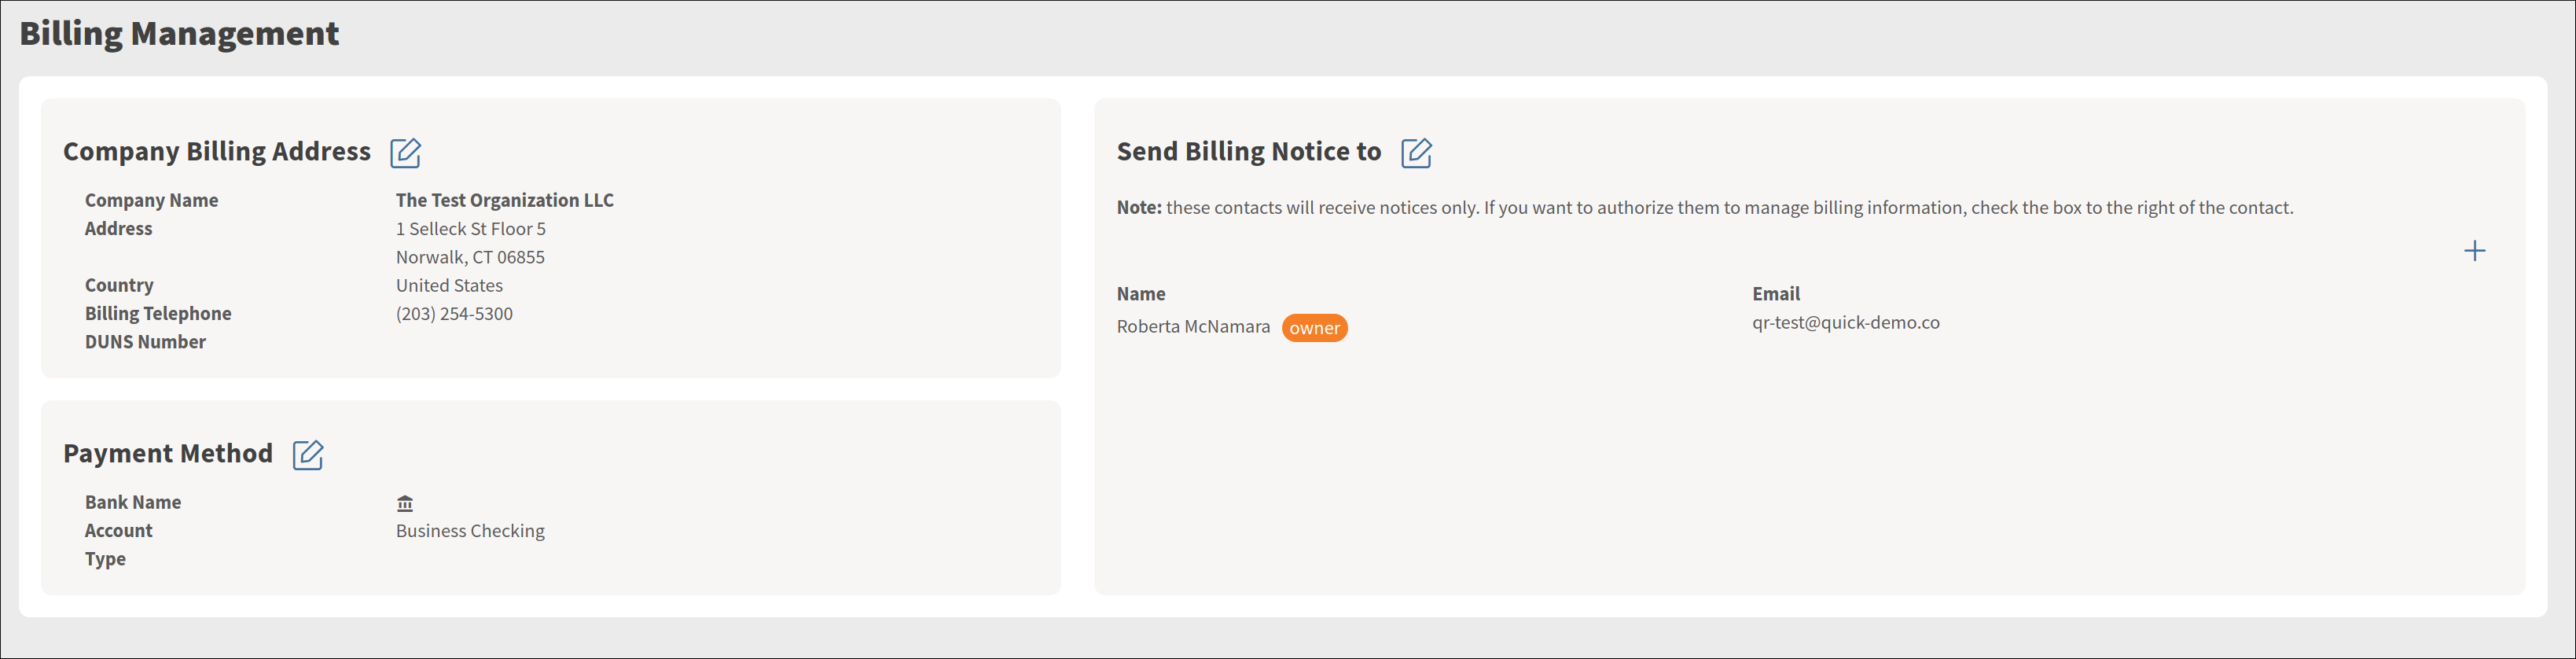
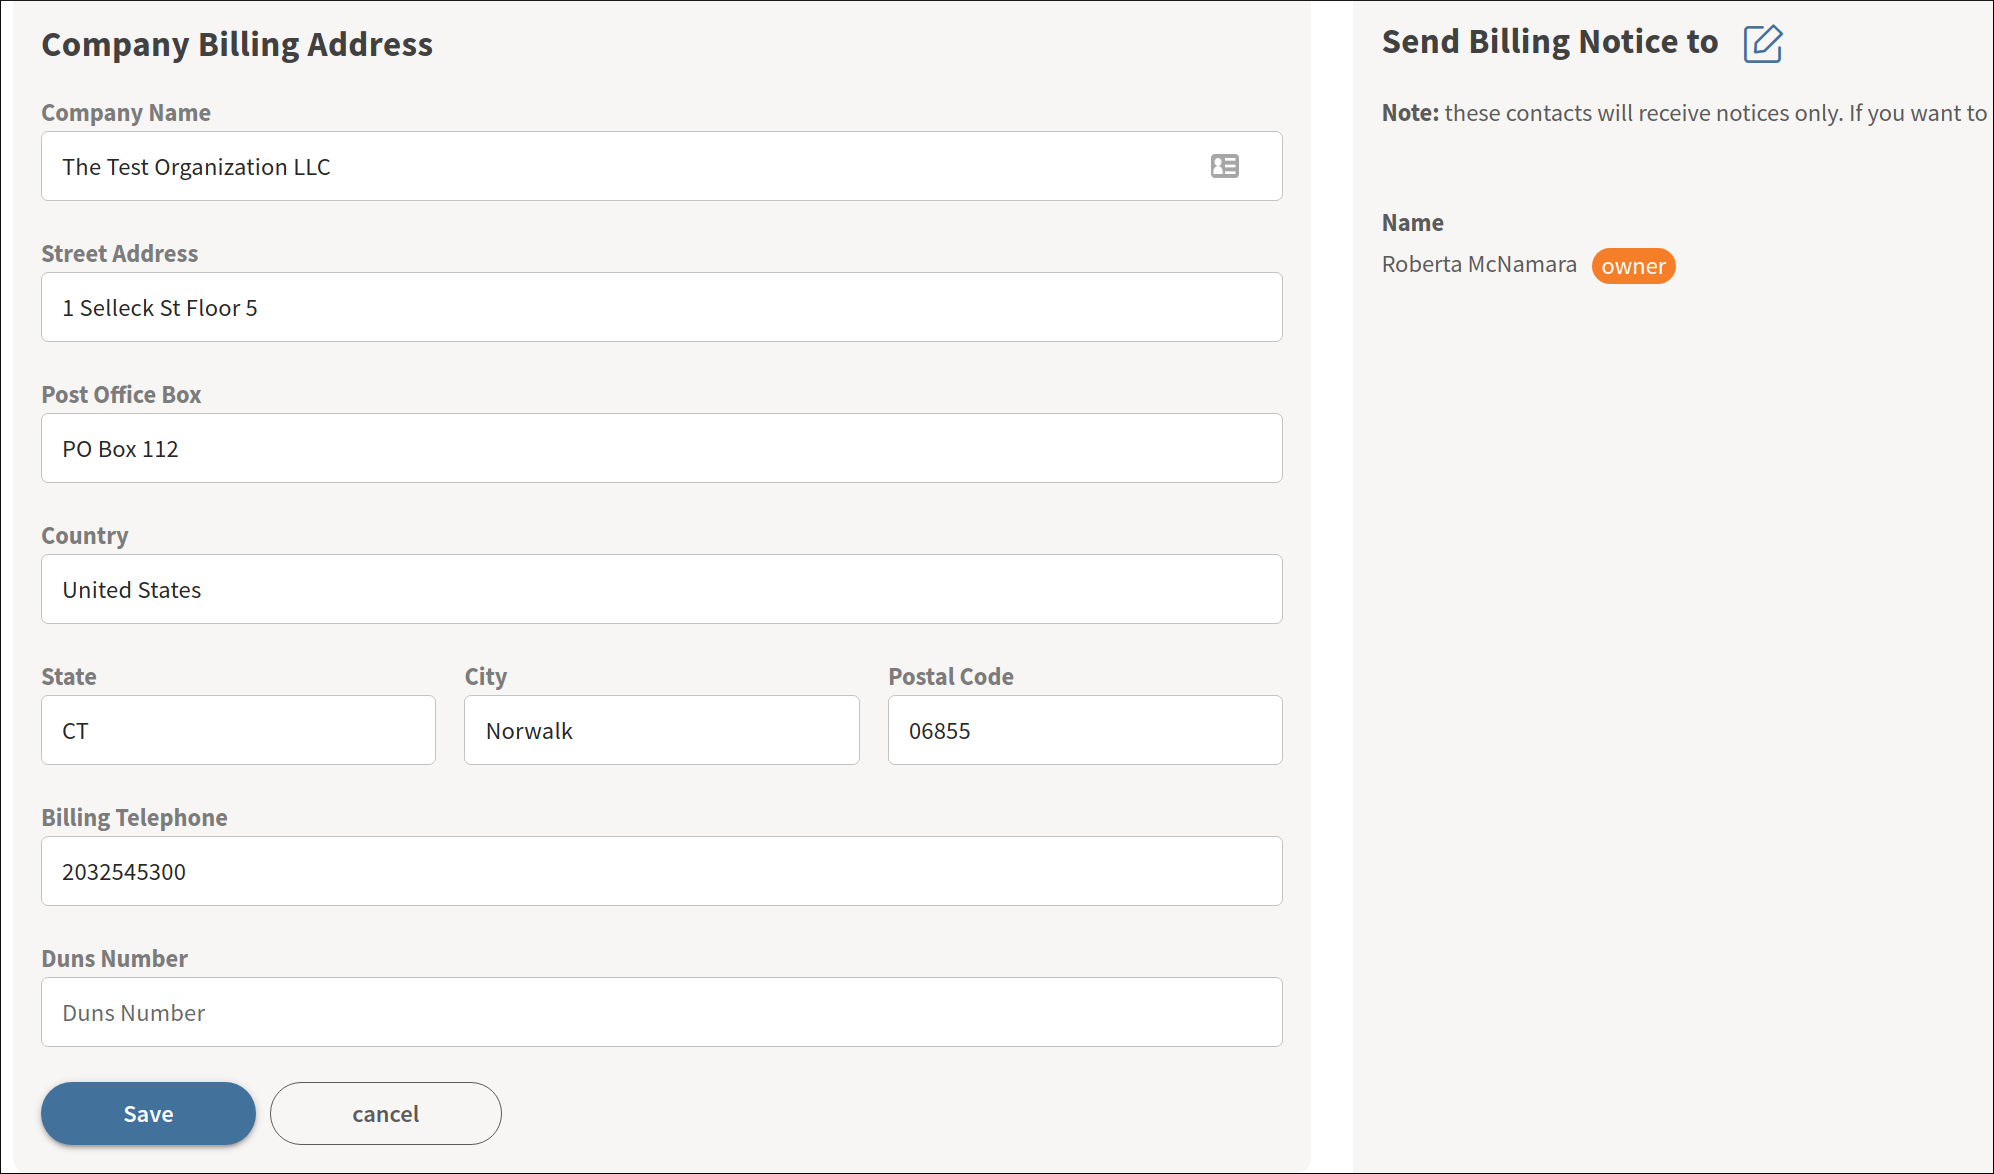
# Step 1: Company Information
Any company information you provided during sign-up will be filled in already in this section, but you may edit it as needed. Click the pencil icon next to the section heading to edit.
In some cases, you may be asked to provide your Duns number. You may need to obtain this from your accounting department.
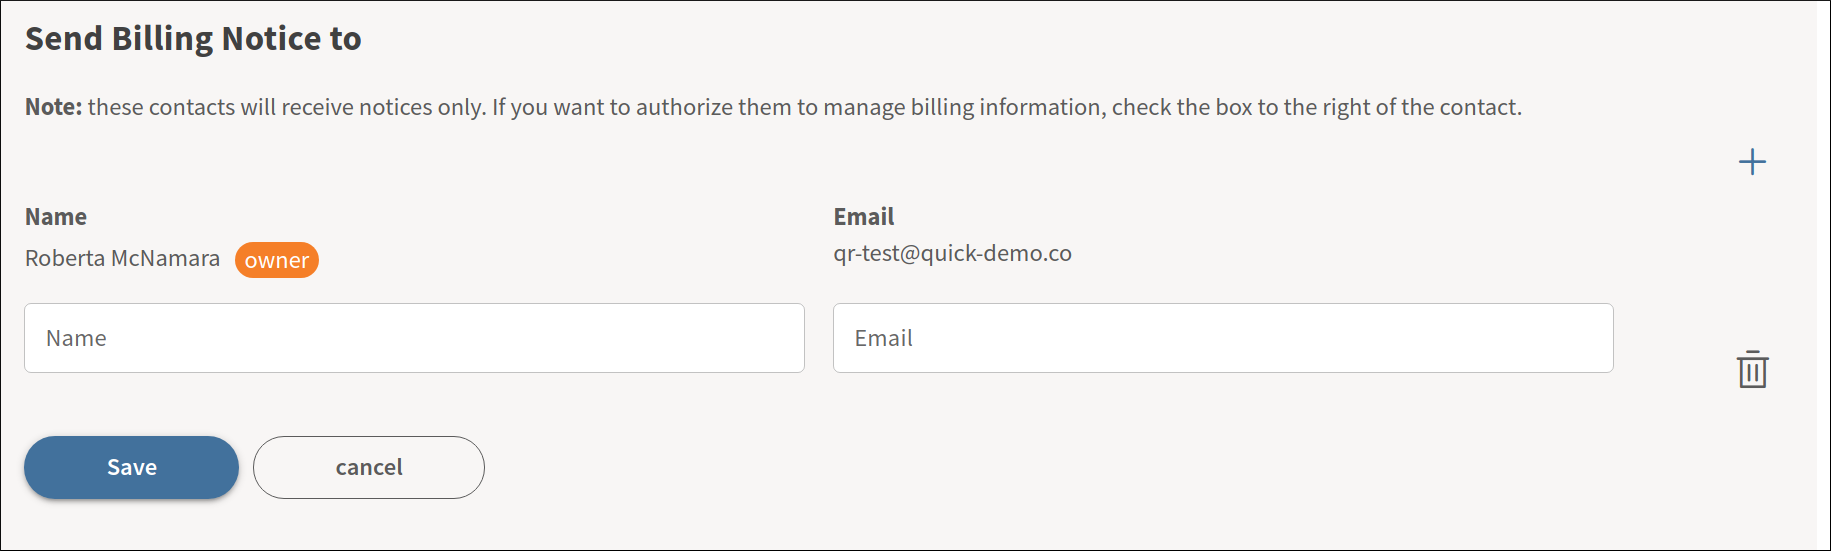
# Step 2: Billing Contacts and Users
In this section, you can add contact information for additional people who should receive billing-related notices, such as invoices and statements. Note that these contacts do not need to be registered users of QuickCover® and will not be added as users unless you check the box next to their information.
If you want to add a contact as a billing user, check the box:
- If they do not already have an account, the system will add them as a new user and assign them the billing user role. To grant them additional permissions, you may do that from the user management application.
- If the contact already has an account, the system will assign them the billing user role in addition to any permissions they already have.
If you wish to remove a billing contact, select the trashcan icon next to their information.
WARNING
Removing a user as a billing contact on this form does not remove them as a QuickCover® user, nor does it change their permissions. Go to user management to remove someone or alter their roles.
# Step 3: Add a Payment Method
The final step is to add a payment method.
To add a payment method:
- Click the pencil icon in the Payment Method card.
- Enter your credit card information.
- Click Save.
Note
If you are selling plans for a QuickCover® affiliate partner, you may not be required to set up a payment method. Instead, the QuickCover® platform will relay sales information to the partner you work with, and that partner will bill you.