# Overview
Stores in your QuickCover® account represent your e-commerce stores. Create one for each e-commerce store you have.

# Creating a Store
To add a new store:
- In the left-side navigation panel, go to Applications > Store Configuration.
- Click
 at the top of the screen. The Add Store form opens.
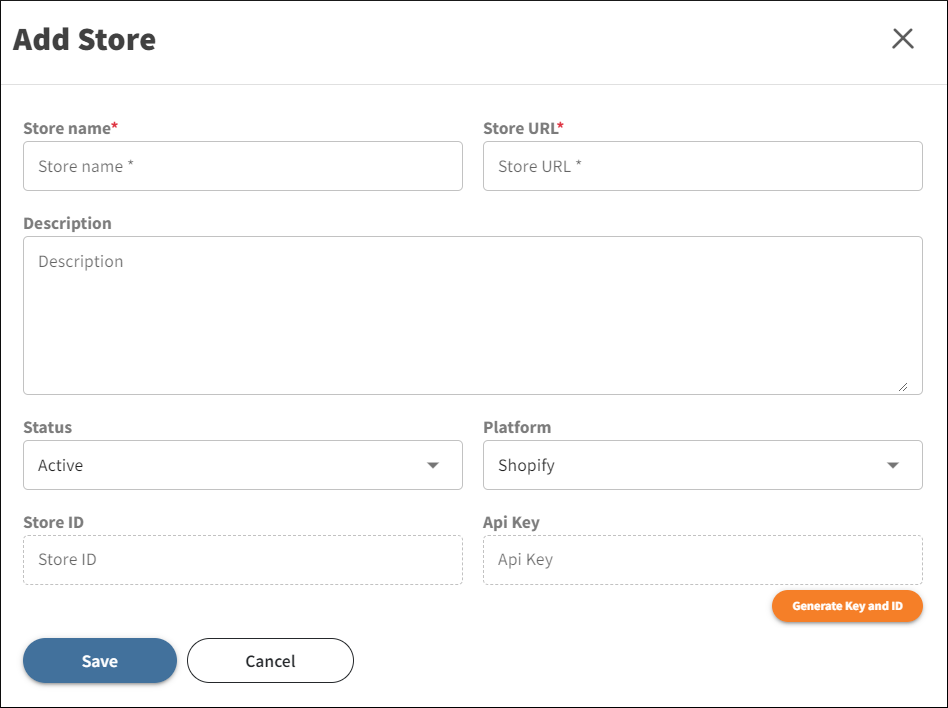
- Enter the store details.
- You will need the Store ID and the API Key to connect your e-commerce store and your QuickCover® account. To generate these credentials, click Generate Token and ID.
- Click Save.
NOTE
While you can save the store without generating the credentials, you will not be able to sell QuickCover® plans on your e-commerce site until you do.
| Field name | Description | Required |
|---|---|---|
| Store name | The name of your store | Yes |
| Store URL | The web address of your store or store | Yes |
| Description | An optional description | No |
| Status | By default this will be 'Active', but you can change it to 'Inactive', if you wish to stop selling QuickCover® plans. We recommend that you also set the QuickCover® app extension in your store to 'Off'. | Yes |
| Platform | Select the platform used by your store. | Yes |
| Store ID | One of your authentication keys for this store. This is a generated value. | No |
| API Key | One of your authentication keys for this store. This is a generated value. | No |
# Getting the Store ID and API Key for the App Extension
To see the Store ID and API Key for a store, go to Applications > Store Configuration in the left-side navigation panel.

To view the API Key, click ![]() .
.
To make a connection between your e-commerce store and the QuickCover extension app, copy the Store ID and API Key and paste them into the QuickCover® configuration screen on your e-commerce hosting platform.
# Viewing or Updating a Store
- In the left-side navigation panel, go to Applications > Store Configuration.
- Find the store in the list.
- In the Actions column on the right, click
 . The Edit Store form opens.
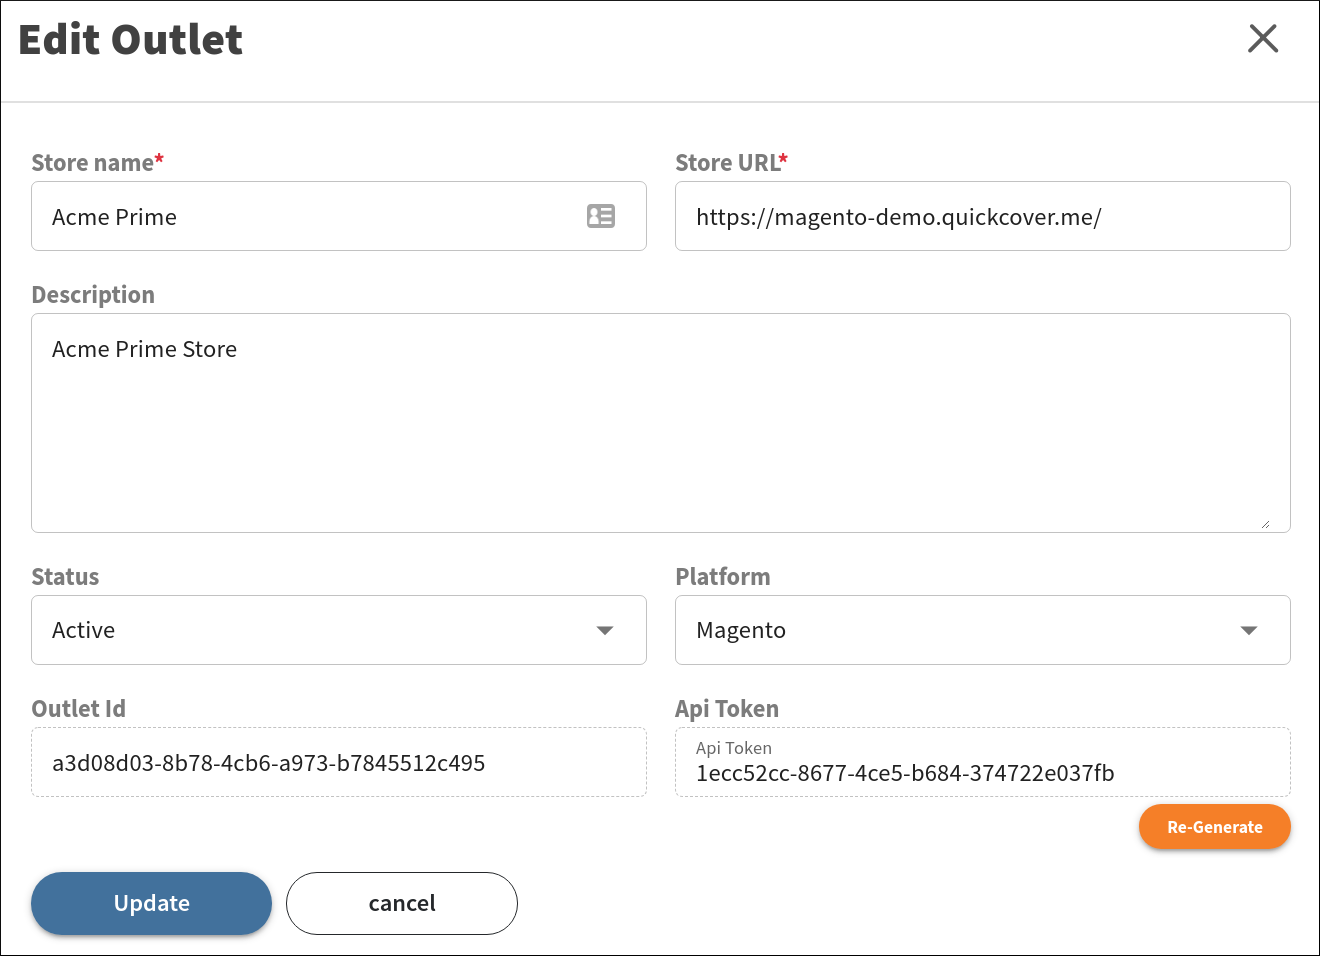
To regenerate the authentication keys for your store, click the Re-Generate button.
IMPORTANT
If you generate a pair of authentication keys, you must update them in the QuickCover® extension configuration on your e-commerce site. The existing values will no longer be recognized and no plan offers will be made to customers on your site.
# Deleting a Store
IMPORTANT
Deleting a store will make any data associated with the store, such as pricing, mapped products, and sales, inaccessible. This may be fine, if the store is new and has no items associated with it. Setting status is 'Inactive' is generally better if you have any doubts.
To delete a store:
- In the left-side navigation panel, go to Applications > Store Configuration.
- Find the store in the list.
- In the Actions column on the right, click
 .
. - Click OK to confirm.
To delete several stores at once:
- Go to Applications > Store Configuration in the left-side navigation panel.
- In the left column, select the check boxes of the stores you need to delete.
- At the top of the page, click .
- Click OK to confirm.
To select all stores on the page, select the check box in the table header.