# Configuring the Plugin
To access the plugin configuration, in the navigation menu, click After Plans > Settings.
IMPORTANT
Whenever you change the plugin settings, click Save Configuration in the bottom-right corner before you navigate away from the page.
# General Settings
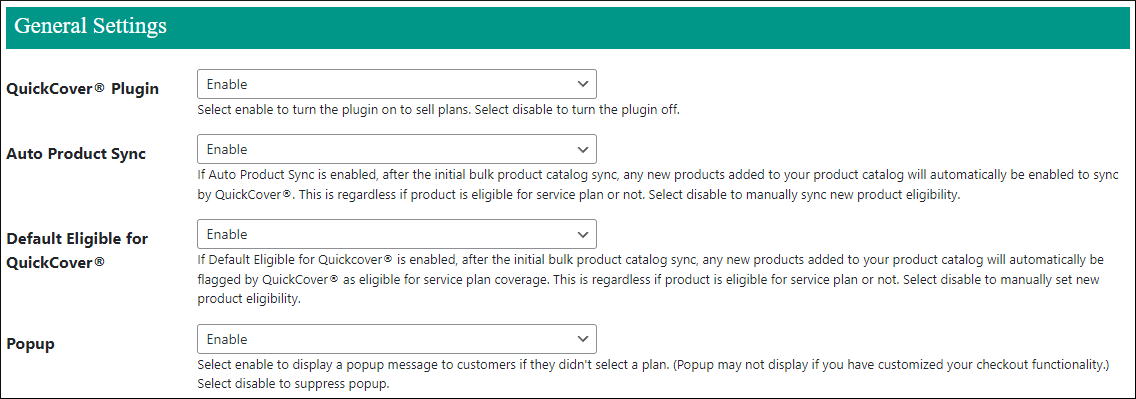
- To start selling the service plans in your WooCommerce store, set QuickCover® Plugin to Enable. If at any time you want to stop using the plugin temporarily, you can disable it here. Leave the plugin enabled during the initial configuration and product sync. Until products are synchronized and mapped in the QuickCover® account, no pricing or other QuickCover® content will appear in your WooCommerce store.
- Auto Product Sync: Enabling this option will force your products to sync automatically with your QuickCover account. Set this to Disable for your initial product catalog setup. Later you may choose to set it to either value. If set to Disable, you will need to sync products manually.
- Default Eligible for QuickCover®: When this option is set to Enable, any new products added to your catalog will automatically be flagged by QuickCover® as eligible for service plan coverage. Select Disable to set new product eligibility manually. For more on syncing products, read Syncing Products from WooCommerce.
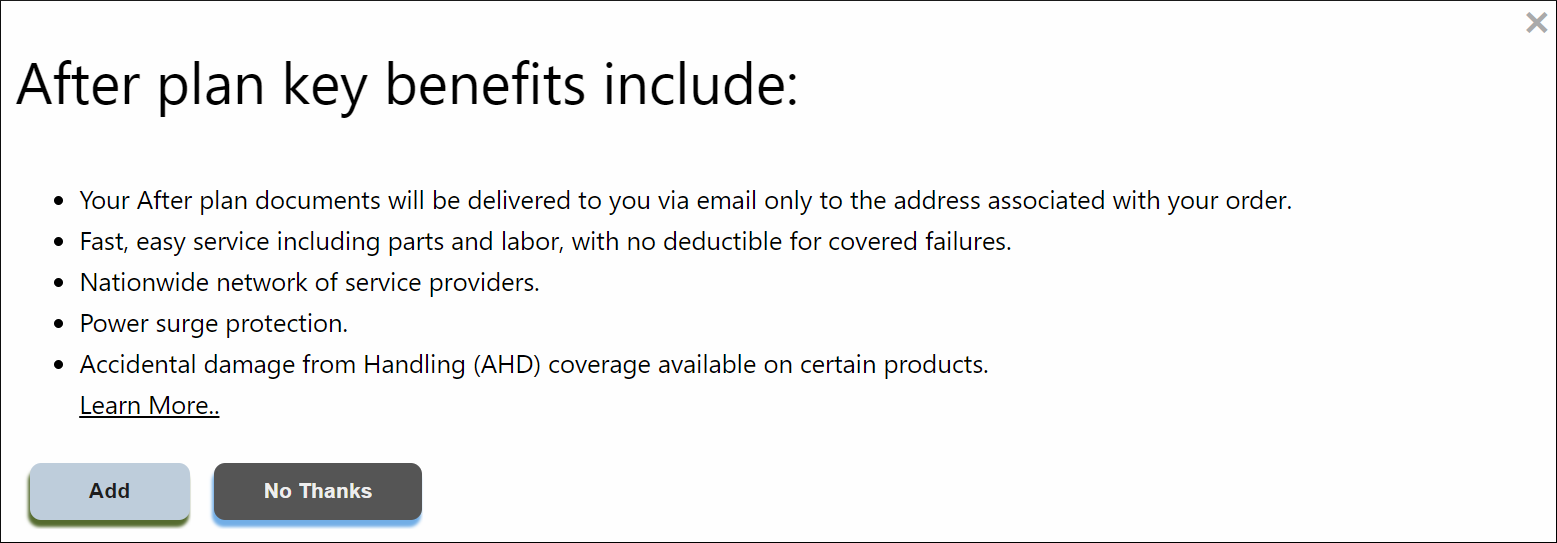
- Popup: With this feature enabled, if your customers don't add the After Product Protection plan to their order, they will see a pop-up dialog with an option to add it. Here is an example of the pop-up:
# Authentication
In the Authentication section, you will enter two values from your QuickCover® account.
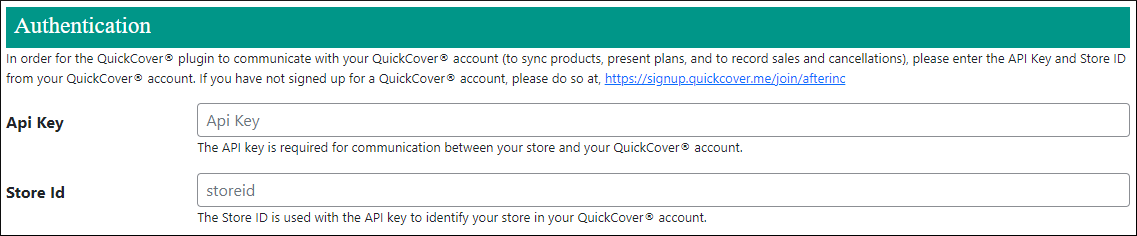
- The API Key is required to communicate with QuickCover® services that return pricing and process orders for extended service plans. Make sure you copy and paste the entire key into the configuration field.
- The Store ID is a value that you set in QuickCover®. This is used in conjunction with the API Key to identify your store.
To find your store ID and API key, log in to your QuickCover account. For more details, read Getting the Store ID and API Key for the App Extension.
To learn how to generate the store ID and API key, read Creating a Store.
Once these values are set, you should not need to change them unless you generate a new API Key in QuickCover.
# Sync Products
The Sync Products section allows you to sync your products in bulk manually. The syncing operation is divided into product batches.
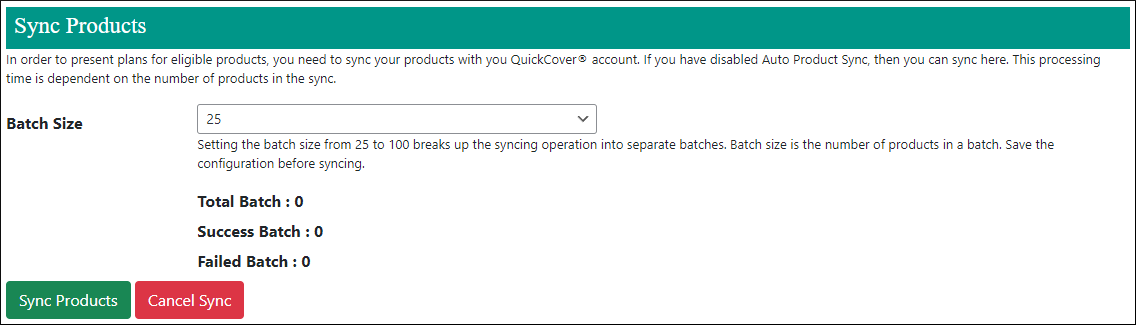
To adjust product sync performance, use the Batch Size field. Batch size is the number of products in a batch.
To save the batch size as default:
- Select the desired batch size.
- Click Save Config.
To learn how to sync products, read Syncing Products.
# Plugin Uninstallation
To backup the plugin settings before uninstalling:
- Select Yes in the Backup drop-down.
- Click Save Configuration.

For more details, read Uninstalling the Plugin.
# Uninstalling the Plugin
# If you want to backup the plugin before uninstalling
- In the navigation menu, click After Plans > Settings.
- Scroll down to the Uninstallation section.
- In the Backup drop-down, choose Yes.
- Click Save Configuration.
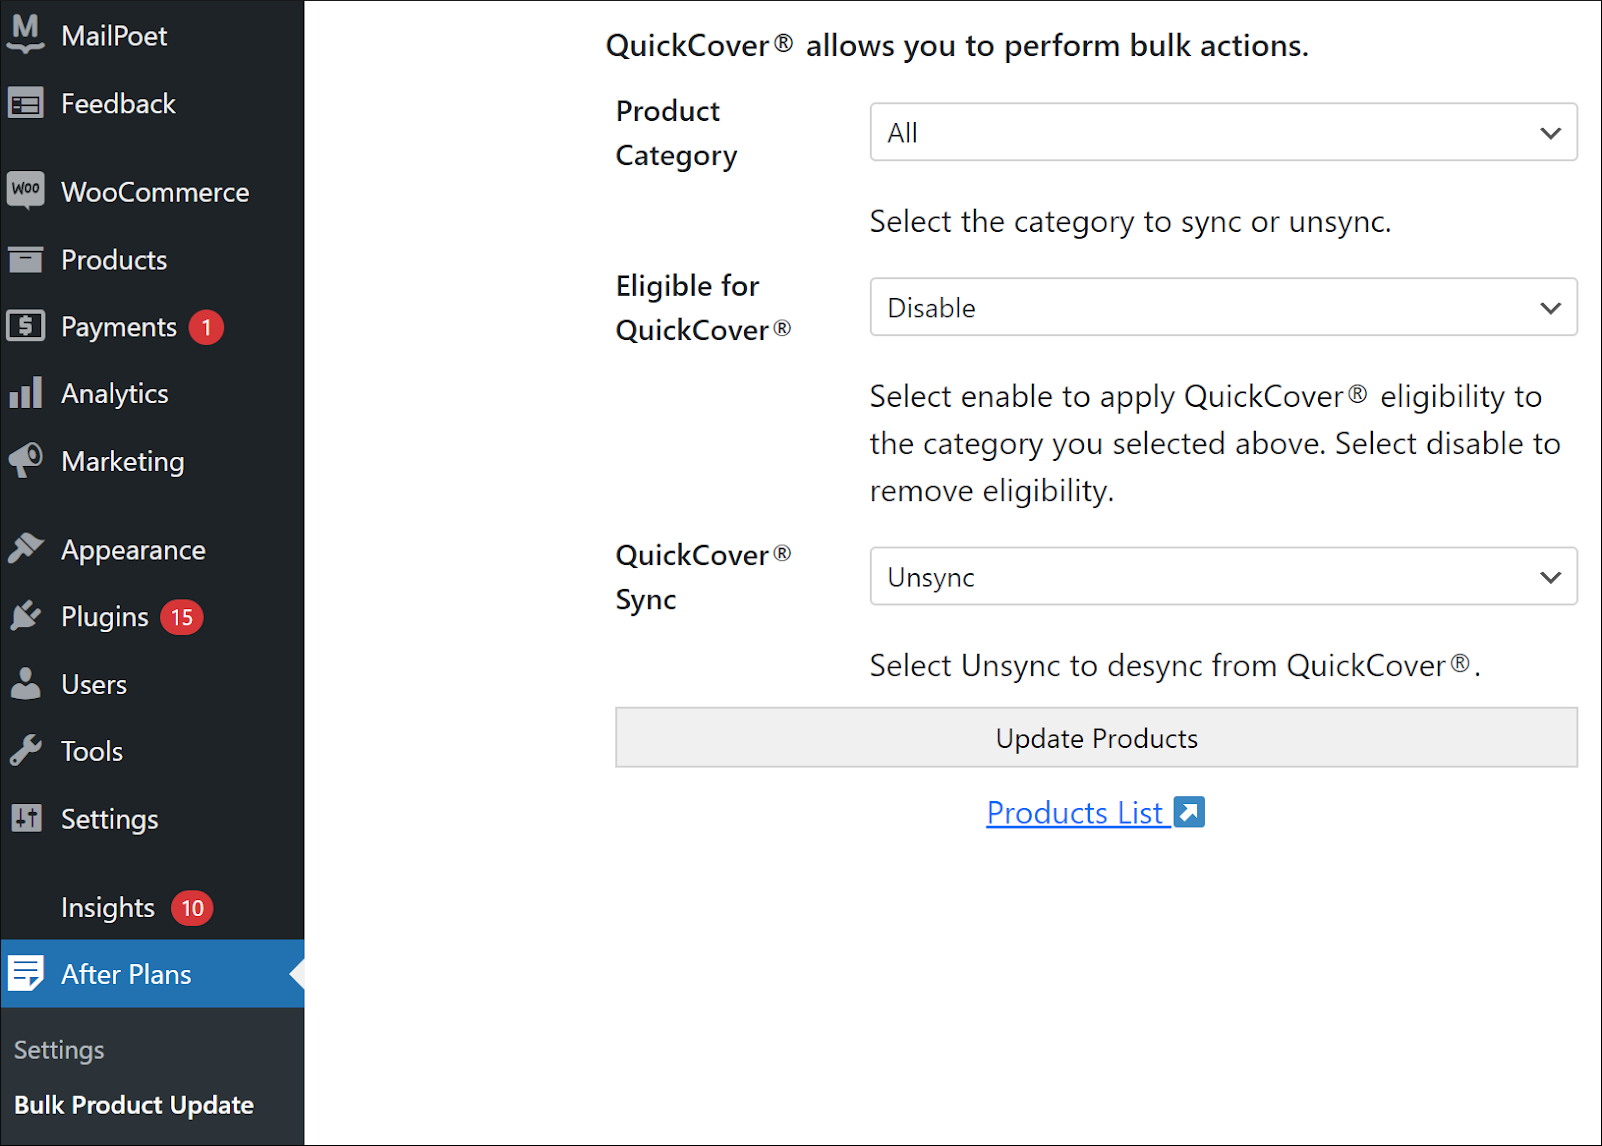
# Prepare your product catalog
- In the WooCommerce left-side navigation menu, go to After Plans > Bulk Product Update.
- In the Product Category drop-down, select All.
- In the Eligible for QuickCover® drop-down, select Disable.
- In the QuickCover® Sync, select Unsync.
- Click Update Products.
# Uninstall the plugin
- In the WooCommerce left-side navigation menu, go to Plugins.
- Find the After Product Protection Plan plugin.

- Click Deactivate. The plugin will become inactive.

- Click Delete.