# Overview
In this article, we cover the basics of acquiring, installing, and configuring the QuickCover® Extension for Magento.
# Installing the Extension
# Adding the Extension
NOTE
In this section, we will use the After Product Protection plan as an example. QuickCover supports selling various protection plans, and Magento will have a QuickCover app for each protection plan. If you are working with a partner, they should provide you with the Protection Plan App to download and the QuickCover account sign-up link.
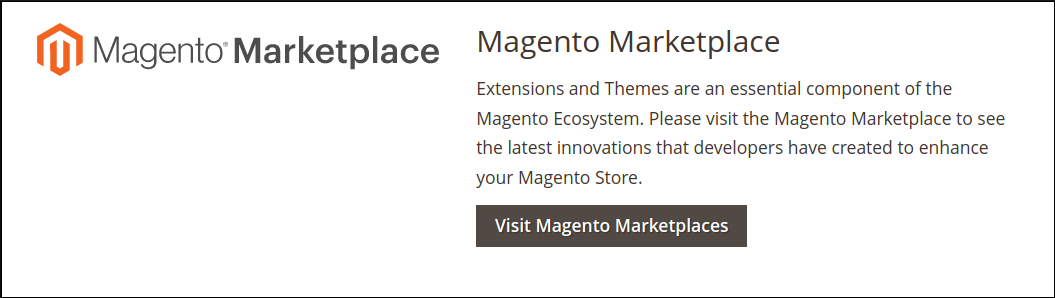
From your Magento store, go to the the Magento Marketplace.
Next, search for the plan that you will be selling. Here we will use the After Product Protection plan as an example. See the note above.
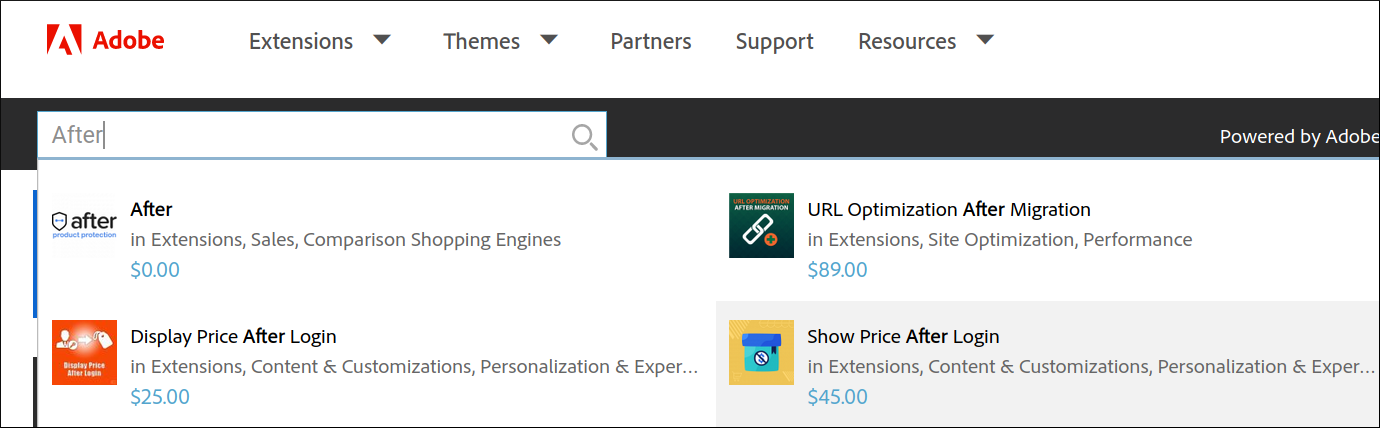
Once you locate the extension, select the version that matches your Magento version. The extension is free to install and you will be billed only for the plans you sell on your store.
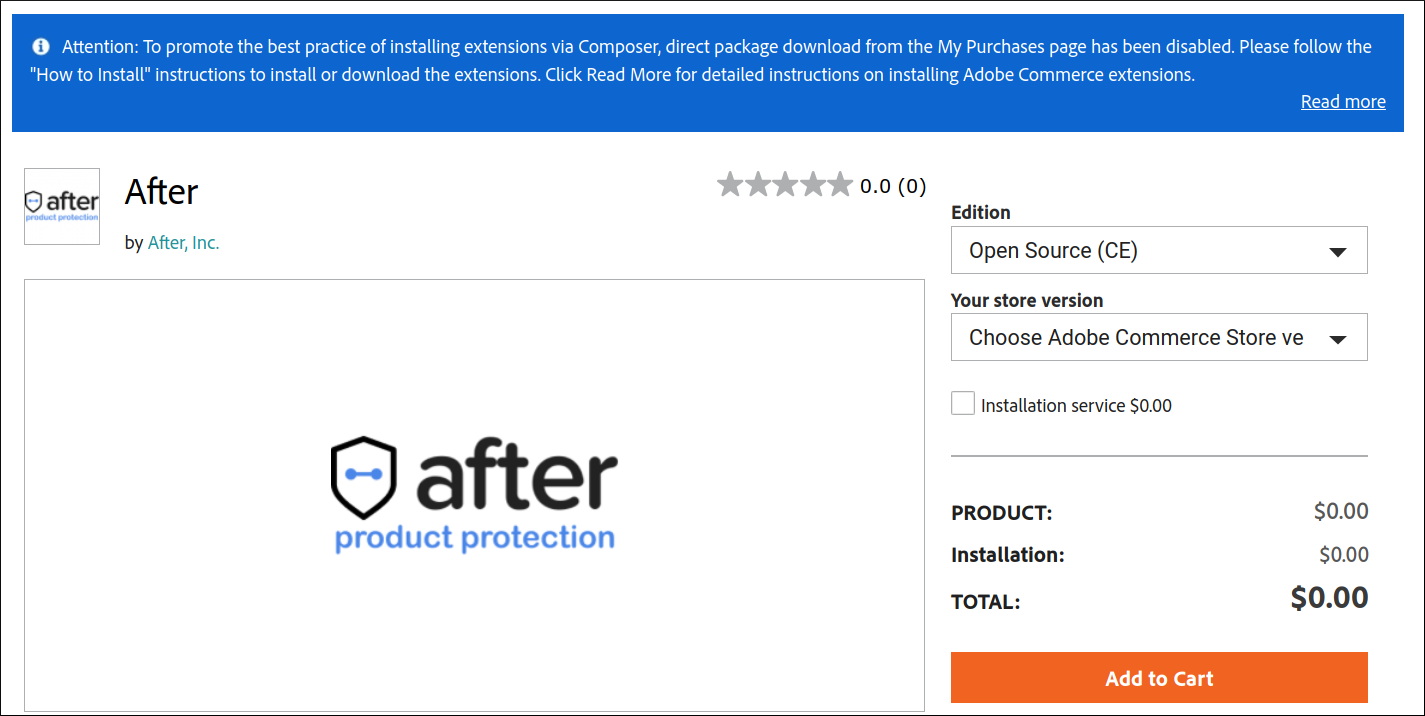
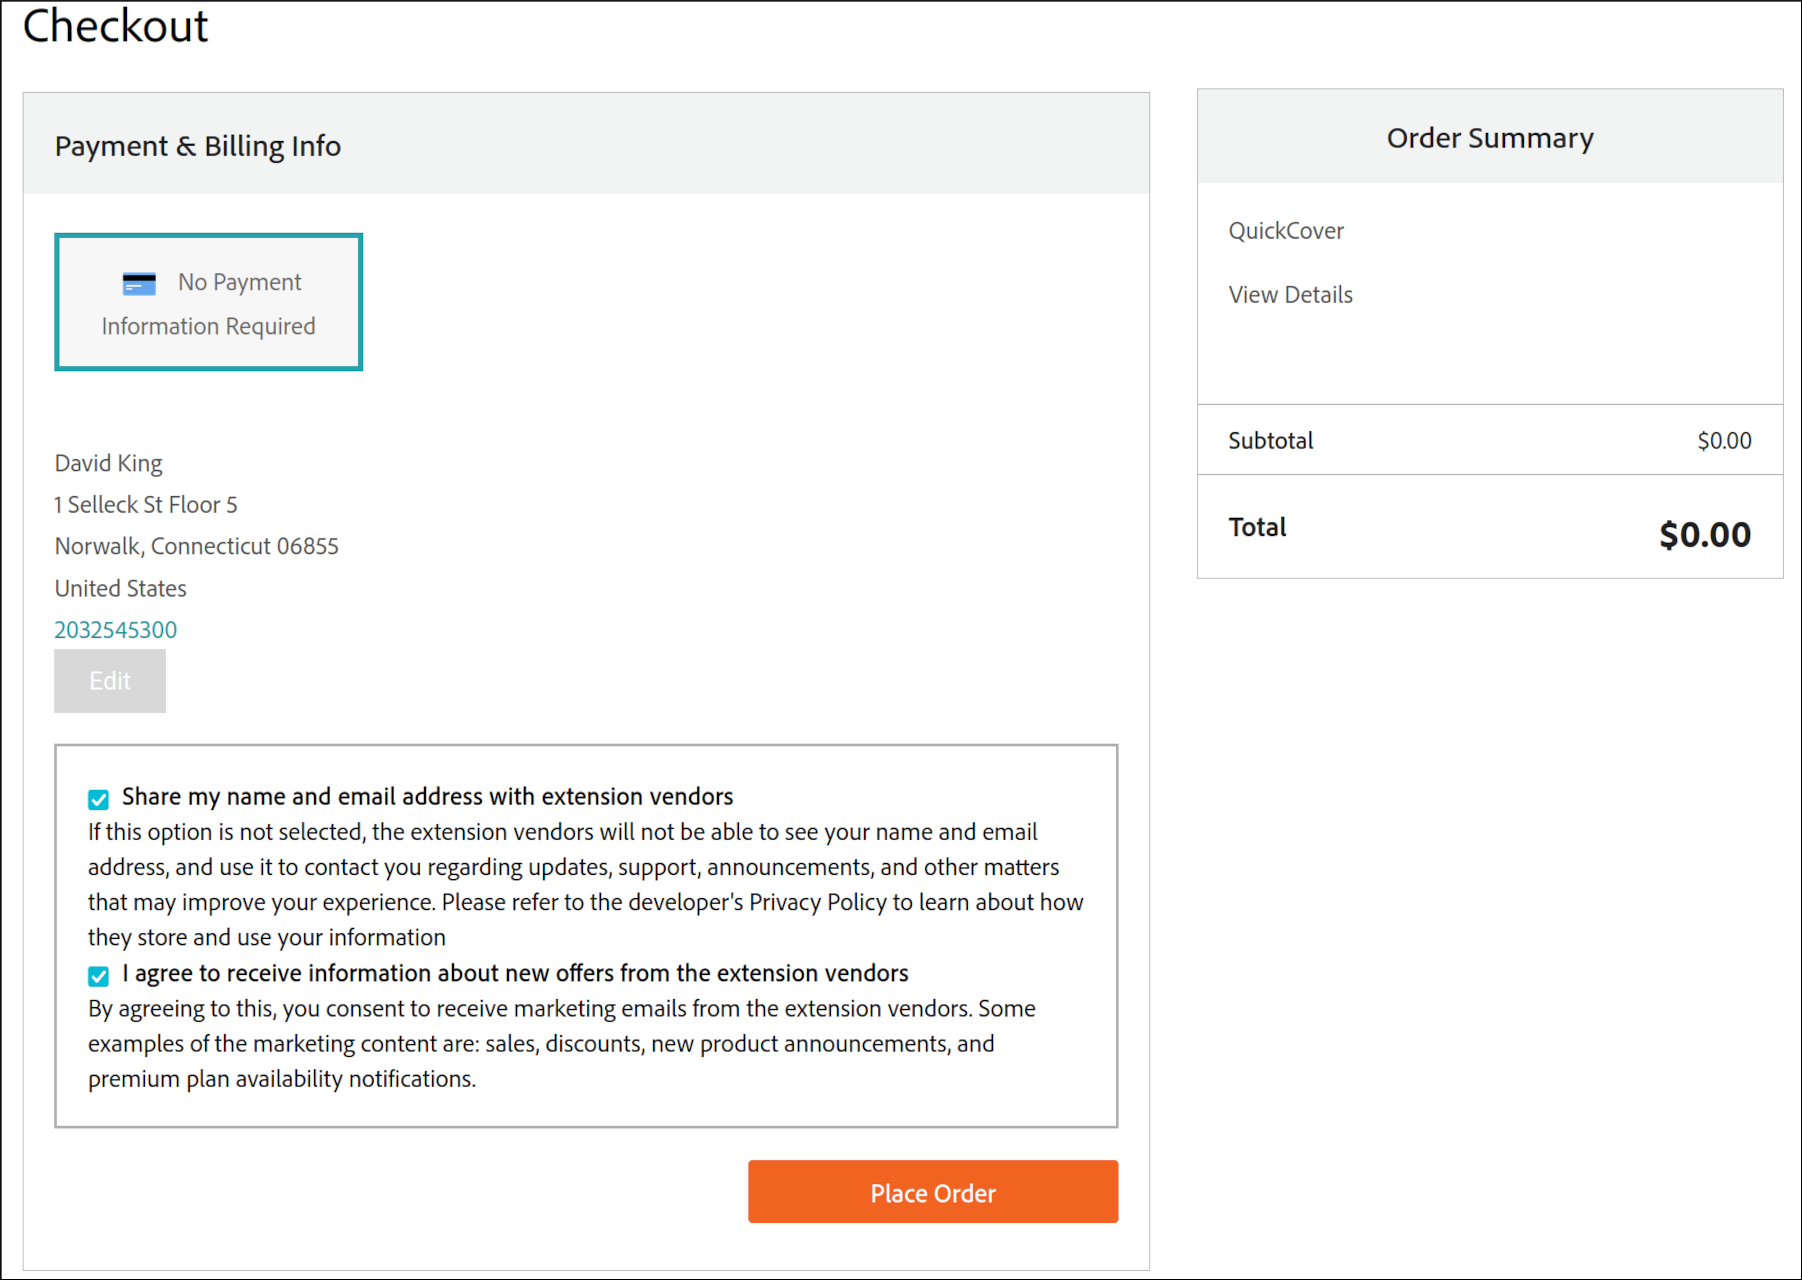
Proceed to checkout by going to the cart.

Finally, complete the checkout procedure. Again, no payment will be due at this stage.
IMPORTANT
If you opt-out of the communications options here, we will still send you notices about product updates, changes to pricing, and other important matters, as noted in our privacy policy.
# Installation
As with any extension, installation requires administrator access to your store's server.
Follow Adobe's installation instructions provided on their DevDocs site (opens new window). Our extension is tested against Magento's platform and should install using these instructions.
# Configuring the Extension
TIP
Before you can use the extension for Magento, you need to create a QuickCover® account.
To learn how to create an account, review the help documentation.
# Step 1: Access the Extension
To configure the extension, you first need to navigate to the installed extension within your Magento store.
- On the left navigation menu, click Stores.
- Click Configuration.
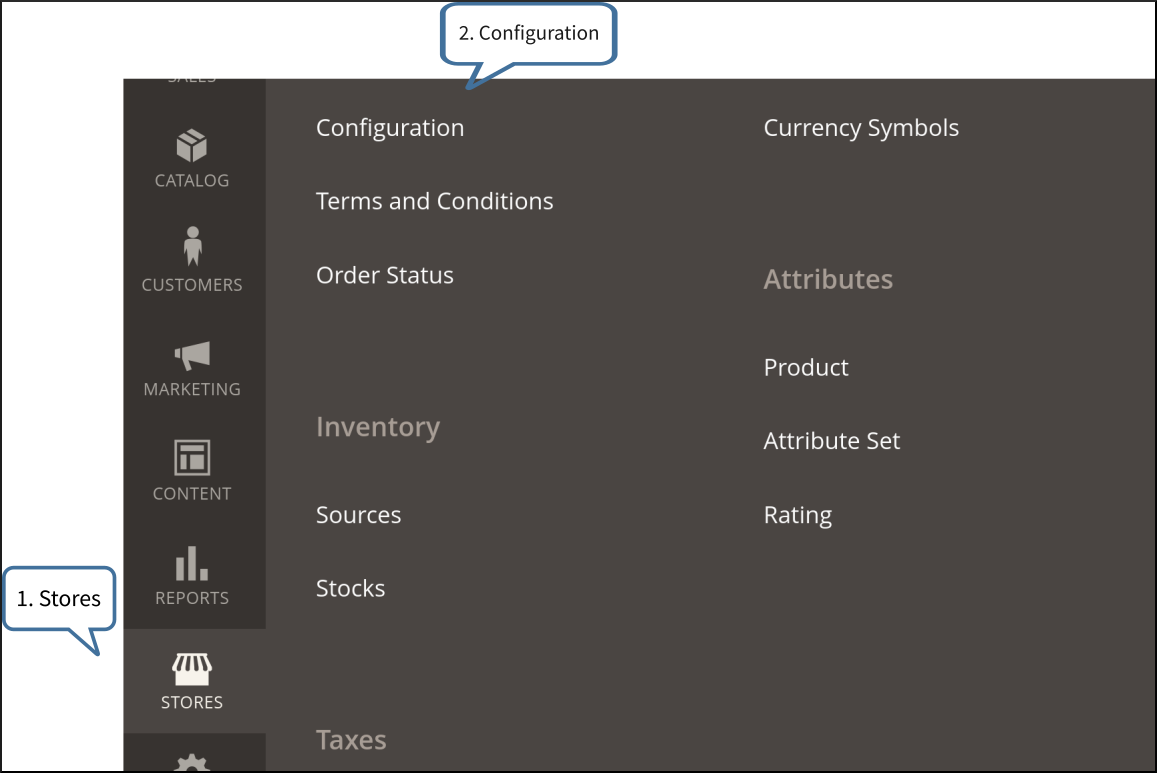
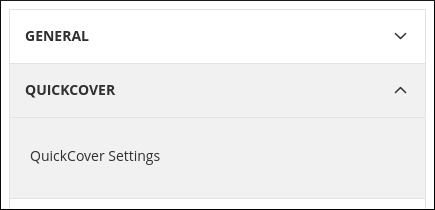
- On the Configuration page, click QuickCover > QuickCover Settings.
TIP
Whenever you change any of the configuration settings, be sure to click the Save Config button to save your changes.
# Step 2: Enabling the Extension And Automatic Sync
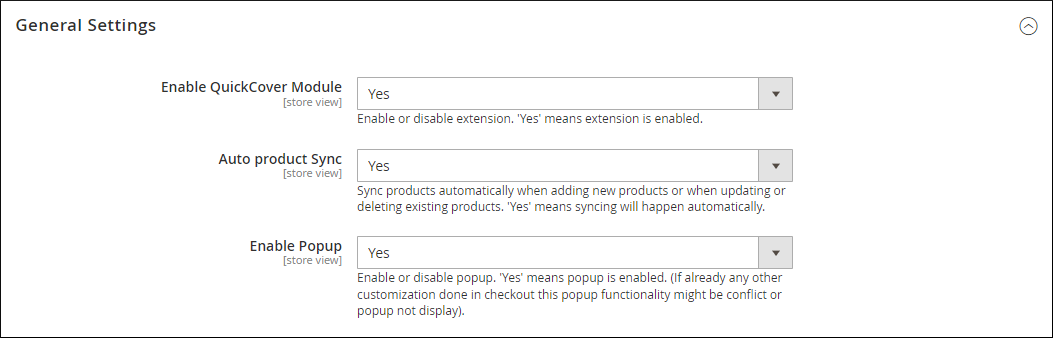
In the General Settings section of the extension configuration screen, you have the following options:
- Enable QuickCover Module: We recommend that you leave this option as Yes during the initial configuration of the extension and your products. If it is set to No, certain configuration items will be unavailable. Until products are synced and mapped in the QuickCover® console, no pricing or other QuickCover® content will appear in your Magento store.
- Auto product Sync: We recommend setting this to No as you do your initial product catalog setup with QuickCover® enabled. Thereafter you may choose to set it to either value. If set to No, you will need to sync products manually.
- Enable Pop-up: With this feature enabled, your customer will see a pop-up message if they don't add an After Product plan to their shopping cart with a new product.
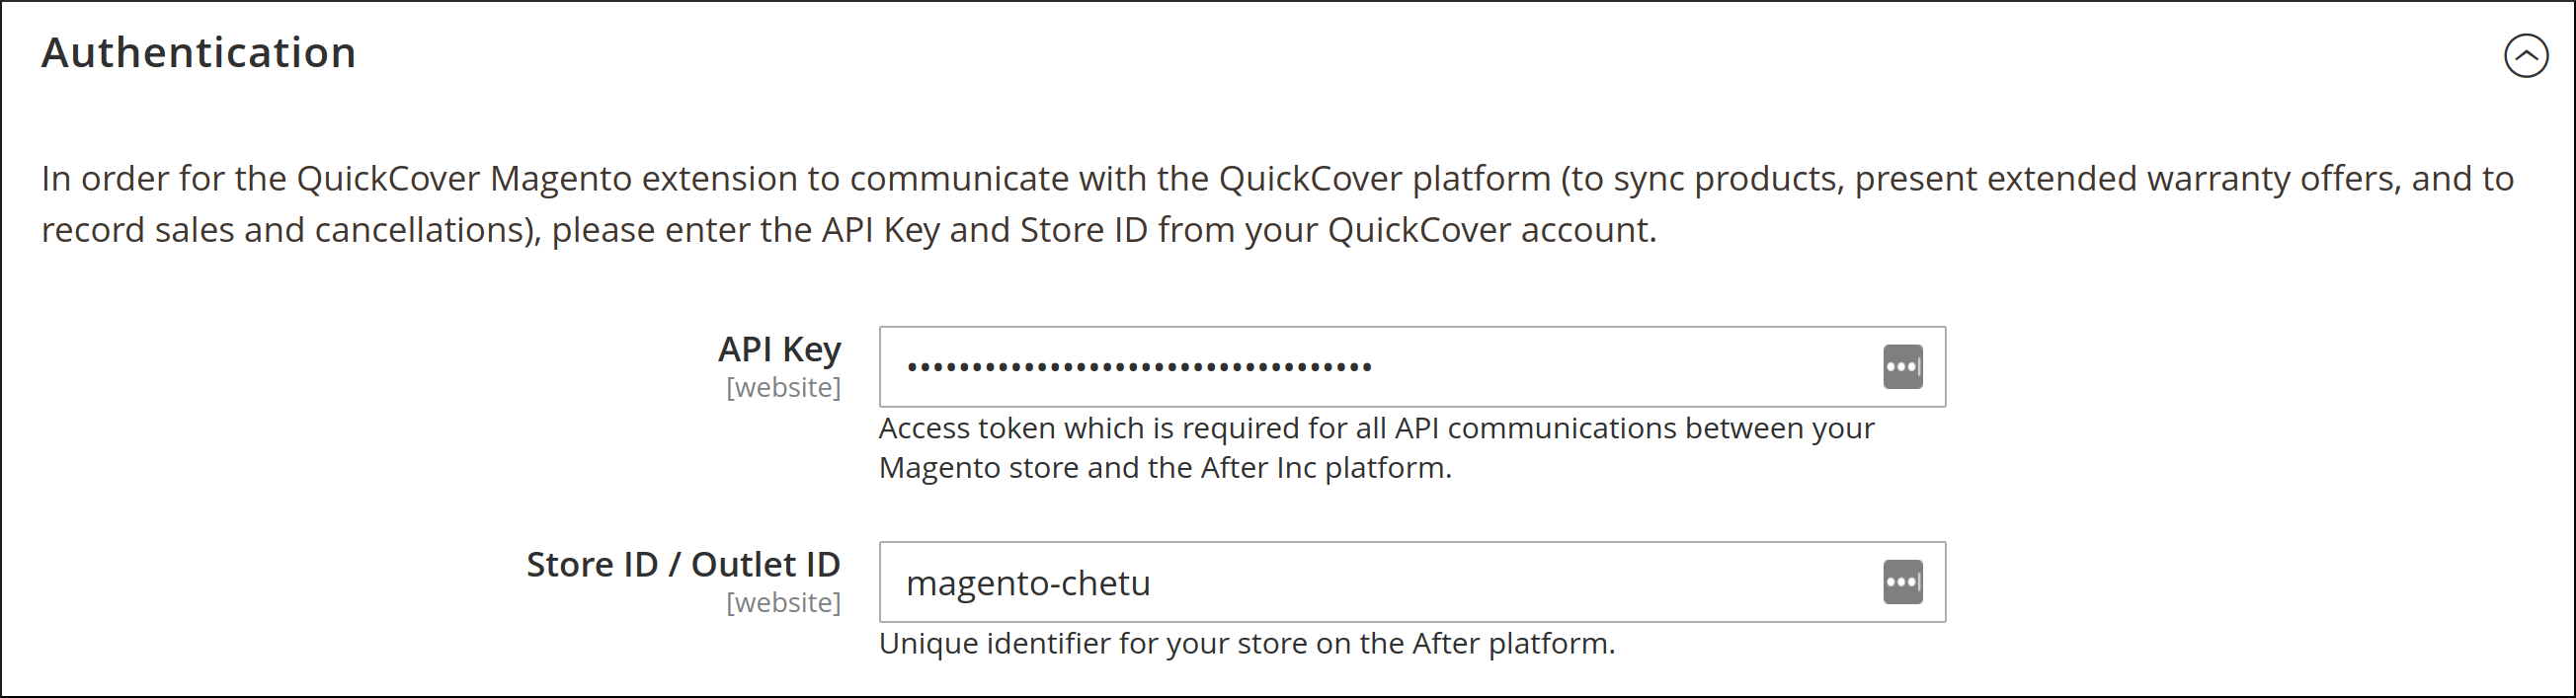
# Step 3: Authentication Credentials
In the Authentication section, you will enter two values from your QuickCover® account. You will need to log in to QuickCover to get these values.
- The API Key is used to communicate with QuickCover® services that return pricing and process orders for extended service plans. Make sure that you copy the entire key and paste it into the configuration field.
- The Store ID is a value that you set in QuickCover®. This is used in conjunction with the API Key to identify your store.
To find your API Key and Store ID:
- Log in to QuickCover.
- Go to Store Configuration in the left-side navigation panel.
For more details, read Getting the Store ID and API Key for the App Extension.
Paste the values into the corresponding fields in the Authentication section of the Configuration page.
Once these values are set, you will only need to change them if you generate new values in your QuickCover account.
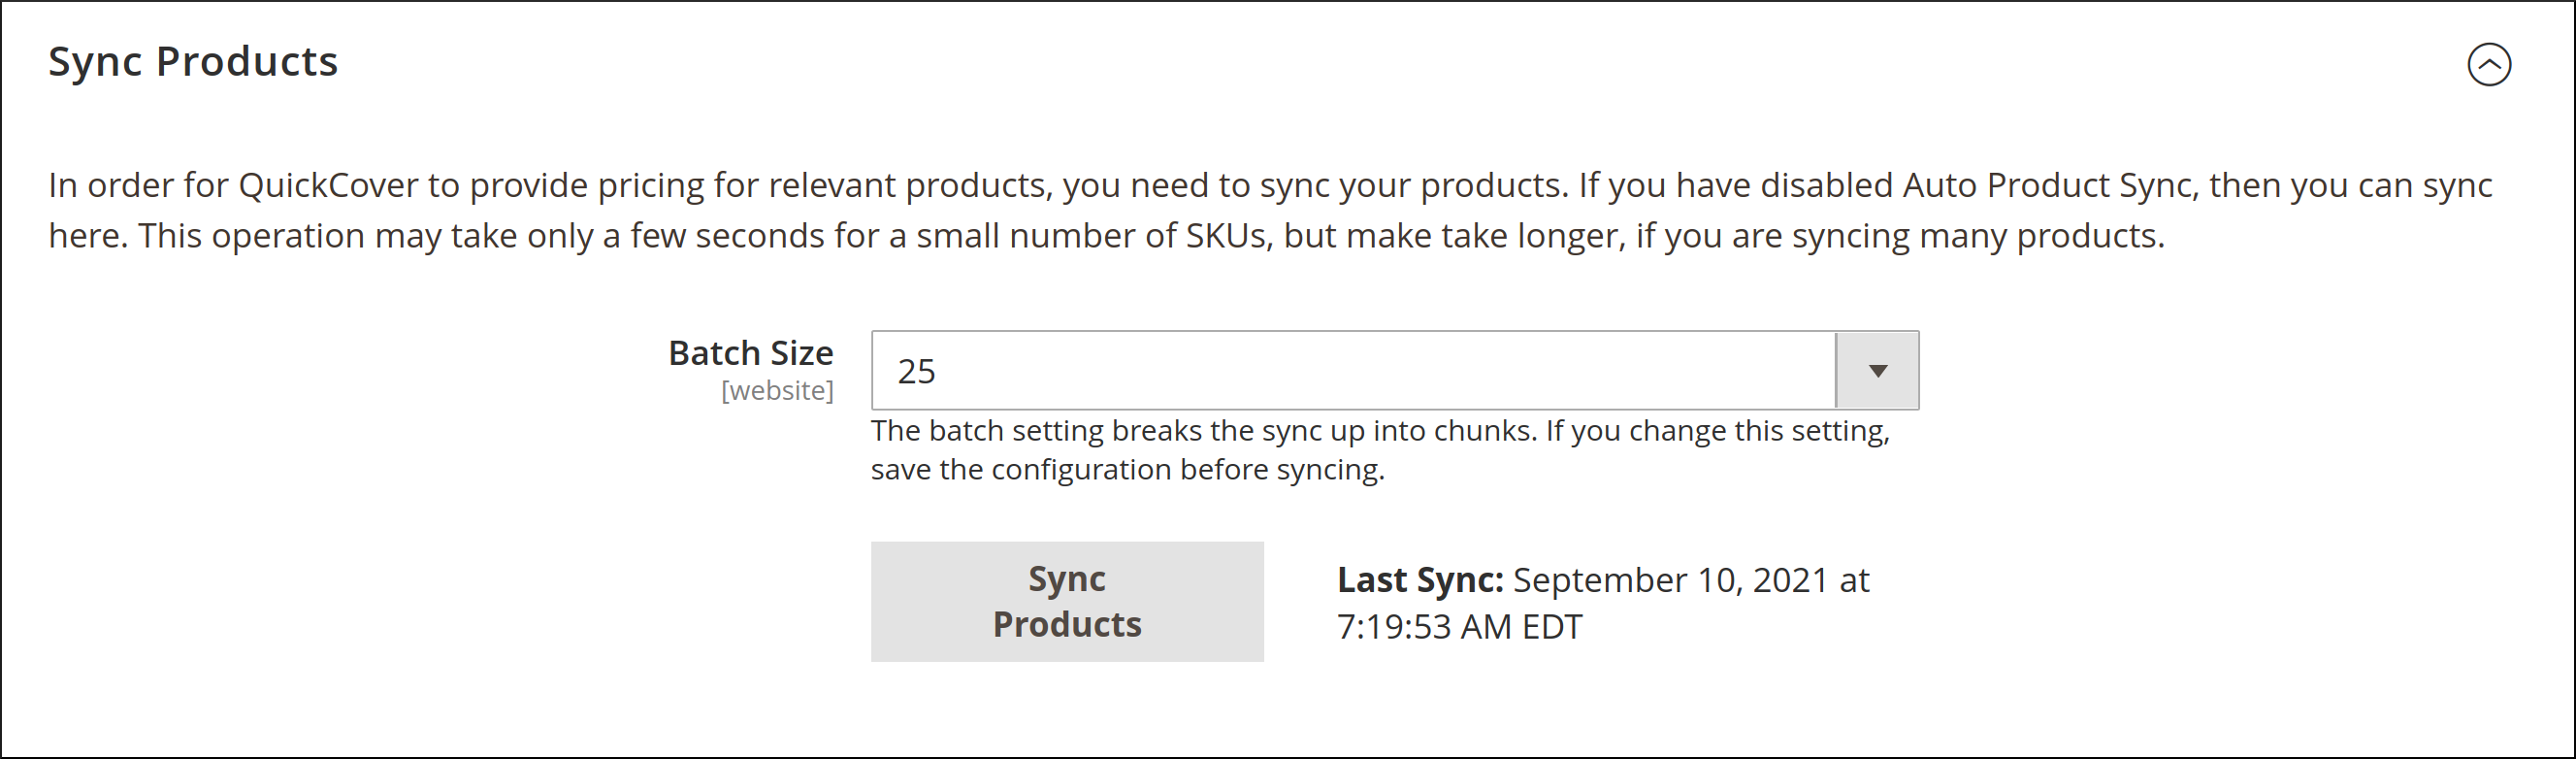
# Step 4: Product Sync
In this section you can configure the manual sync process. The Batch Size setting controls the number of records that will be pushed to QuickCover® in a single batch. If you set Batch Size to 25 and sync 100 records, the sync process will send 4 batches of 25 records each. Use this setting, to achieve a good balance between performance and reliability.
To change this setting:
- Set the desired batch size.
- Click Save Config.
For more detail on syncing product, read product sync.